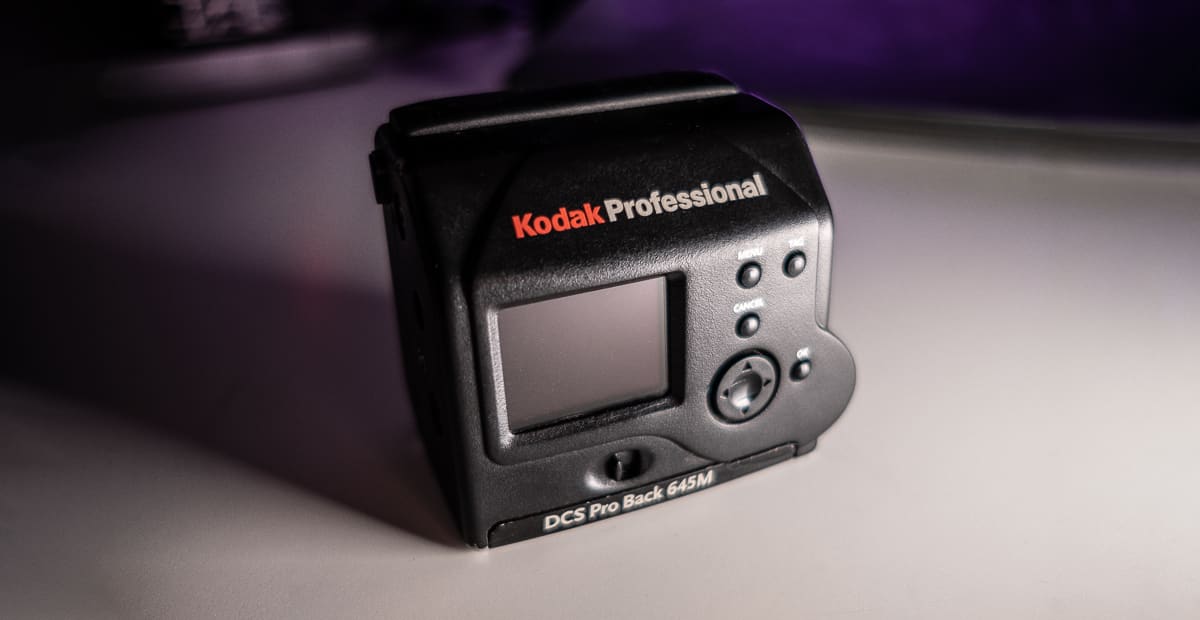
I recently stumbled upon some photographers on Flickr that all use an old medium format digital back and I was blown away by their photos. It’s the Kodak DCS 645 Pro Back, a digital back released in 2002 (20 years!!!), the price when it was released was $12,000, so not just a average camera but something very special. What caught my attention was the colors of the sensor, it almost looks like Kodak Ektar or Kodachrome, but this is not film it’s digital. Especially for daylight photos I’m burned out on digital cameras, the photos look boring and I often end up trying analog film as an alternative, just to get disappointed and returning to digital again. So if this can give you amazing colors on digital, this is really worth trying.
Kodak DCS 645 Pro Back
Here are some of the specs for this old digital back:
- 16 megapixel CCD Sensor
- Sensor size is 36x36mm (square). So it’s not really medium format but more a taller full frame. But pixel wise it’s not far from the Fujifilm GFX.
- Iso 100-400, but iso 200 and iso 400 is just iso 100 pulled up in post processing.
- Supports DCP raw files.
- Writes to CF-cards, officially Kodak only supports very old small cards but never cards don’t seem to be a problem (just format them with in the cameras menu before use).
- Dynamic range is unknown but I’m guessing 10 stops. Highlight recovery is very good, shadows has nasty colored noise when pulled too much.
- Supported camera options: Mamiya 645 AF/AFD or Phase One. Hasselblad H1 / H2. Contax 645. Mamiya RZ67. Hasselblad 555ELD (old school Hassy).
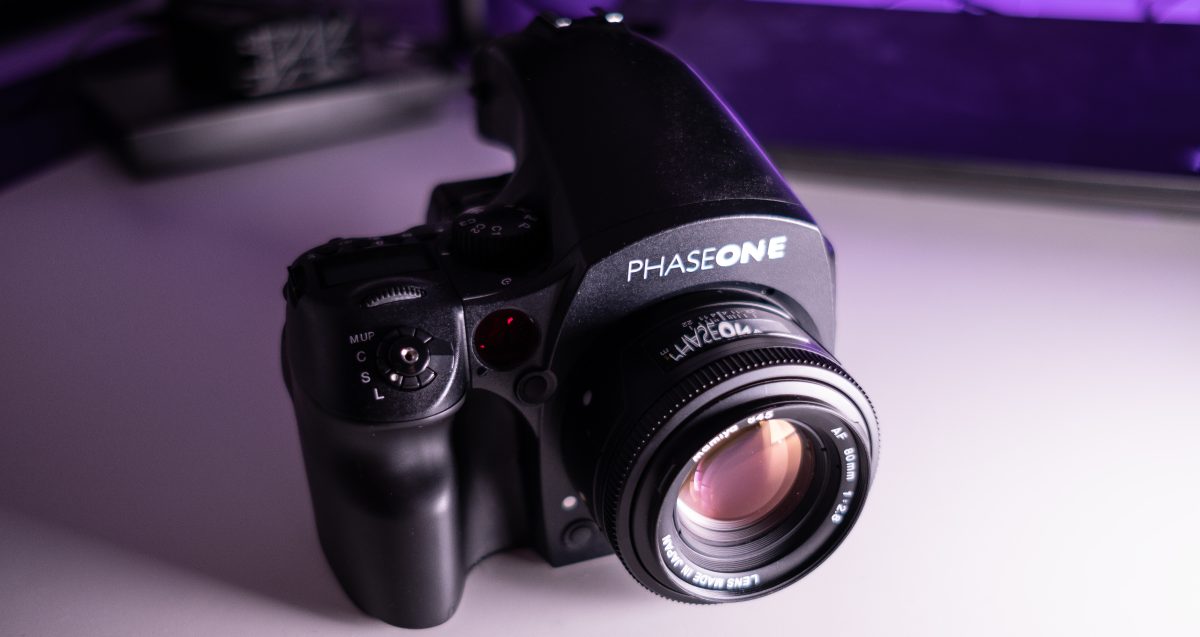
Mamiya 645 / Phase One
As camera for my digital back I picked Mamiya / Phase One. I used Mamiya 645 in the past and think it’s the most underrated medium format system, the lenses are very high quality and even the old ones produced in the 70s can beat modern lenses in some cases. I also like that Mamiya/Phase One has 1/4000 shutter speed for shooting wide open. Phase One bought Mamiya at some point but still support the old Mamiya camera standart up to their Phase One DF or DF+ (but you have to update the firmware of the digital back to use Phase One cameras, scroll down for firmware info).
Kodak DCS 645 Pro Back are hard to find, it was a rare product back then and is even rarer today. The Mamiya version (the Kodak DCS 645M Pro Back) seems to be the most sought after and almost never appears on Ebay. On the other hand there are many one available i.e. the Hasselblad H1 / H2 (the Kodak DCS 645H Pro Back) so maybe consider that one. I would love to try the Contax version with that Zeiss 80mm f2.0 but that camera has become so ridiculously expensive.
For Mamiya / Phase One you have 4 lens options:
- Old manual focus Mamiya 645 lenses. Very high quality lenses made from the mid 70’s to 90’s and often very cheap (for medium format).
- Mamiya AF 645 – often the same lens designs as the older Mamiya 645 lenses but with auto focus, produced in the 90s to 00’s. Compared to the manual focus ones they are made in plastic not in metal, but I don’t mind.
- Schneider-Kreuznach / Mamiya D lenses – produced in the 00’s, more modern lens designs than the older Mamiya AF lenses. Very good lenses, a bit more expensive than Mamiya AF lenses, but for some of the more common ones (like the 80mm) price difference is not that big.
- Schneider-Kreuznach blue ring lenses – this is the current lens line for Phase One. Is designed for the 100 megapixels + Phase One backs, very expensive, probably not worth it for this old digital back.
I got a Phase One DF and a Schneider-Kreuznach 80mm f2.8 pretty cheap on MPB and and later picked up two Mamiya AF lenses (45mm f2.8 and 210mm f4).
My experience
It was a big experience when I first got the camera. The images I got from the camera was very good but I also had a lot of technical problems.
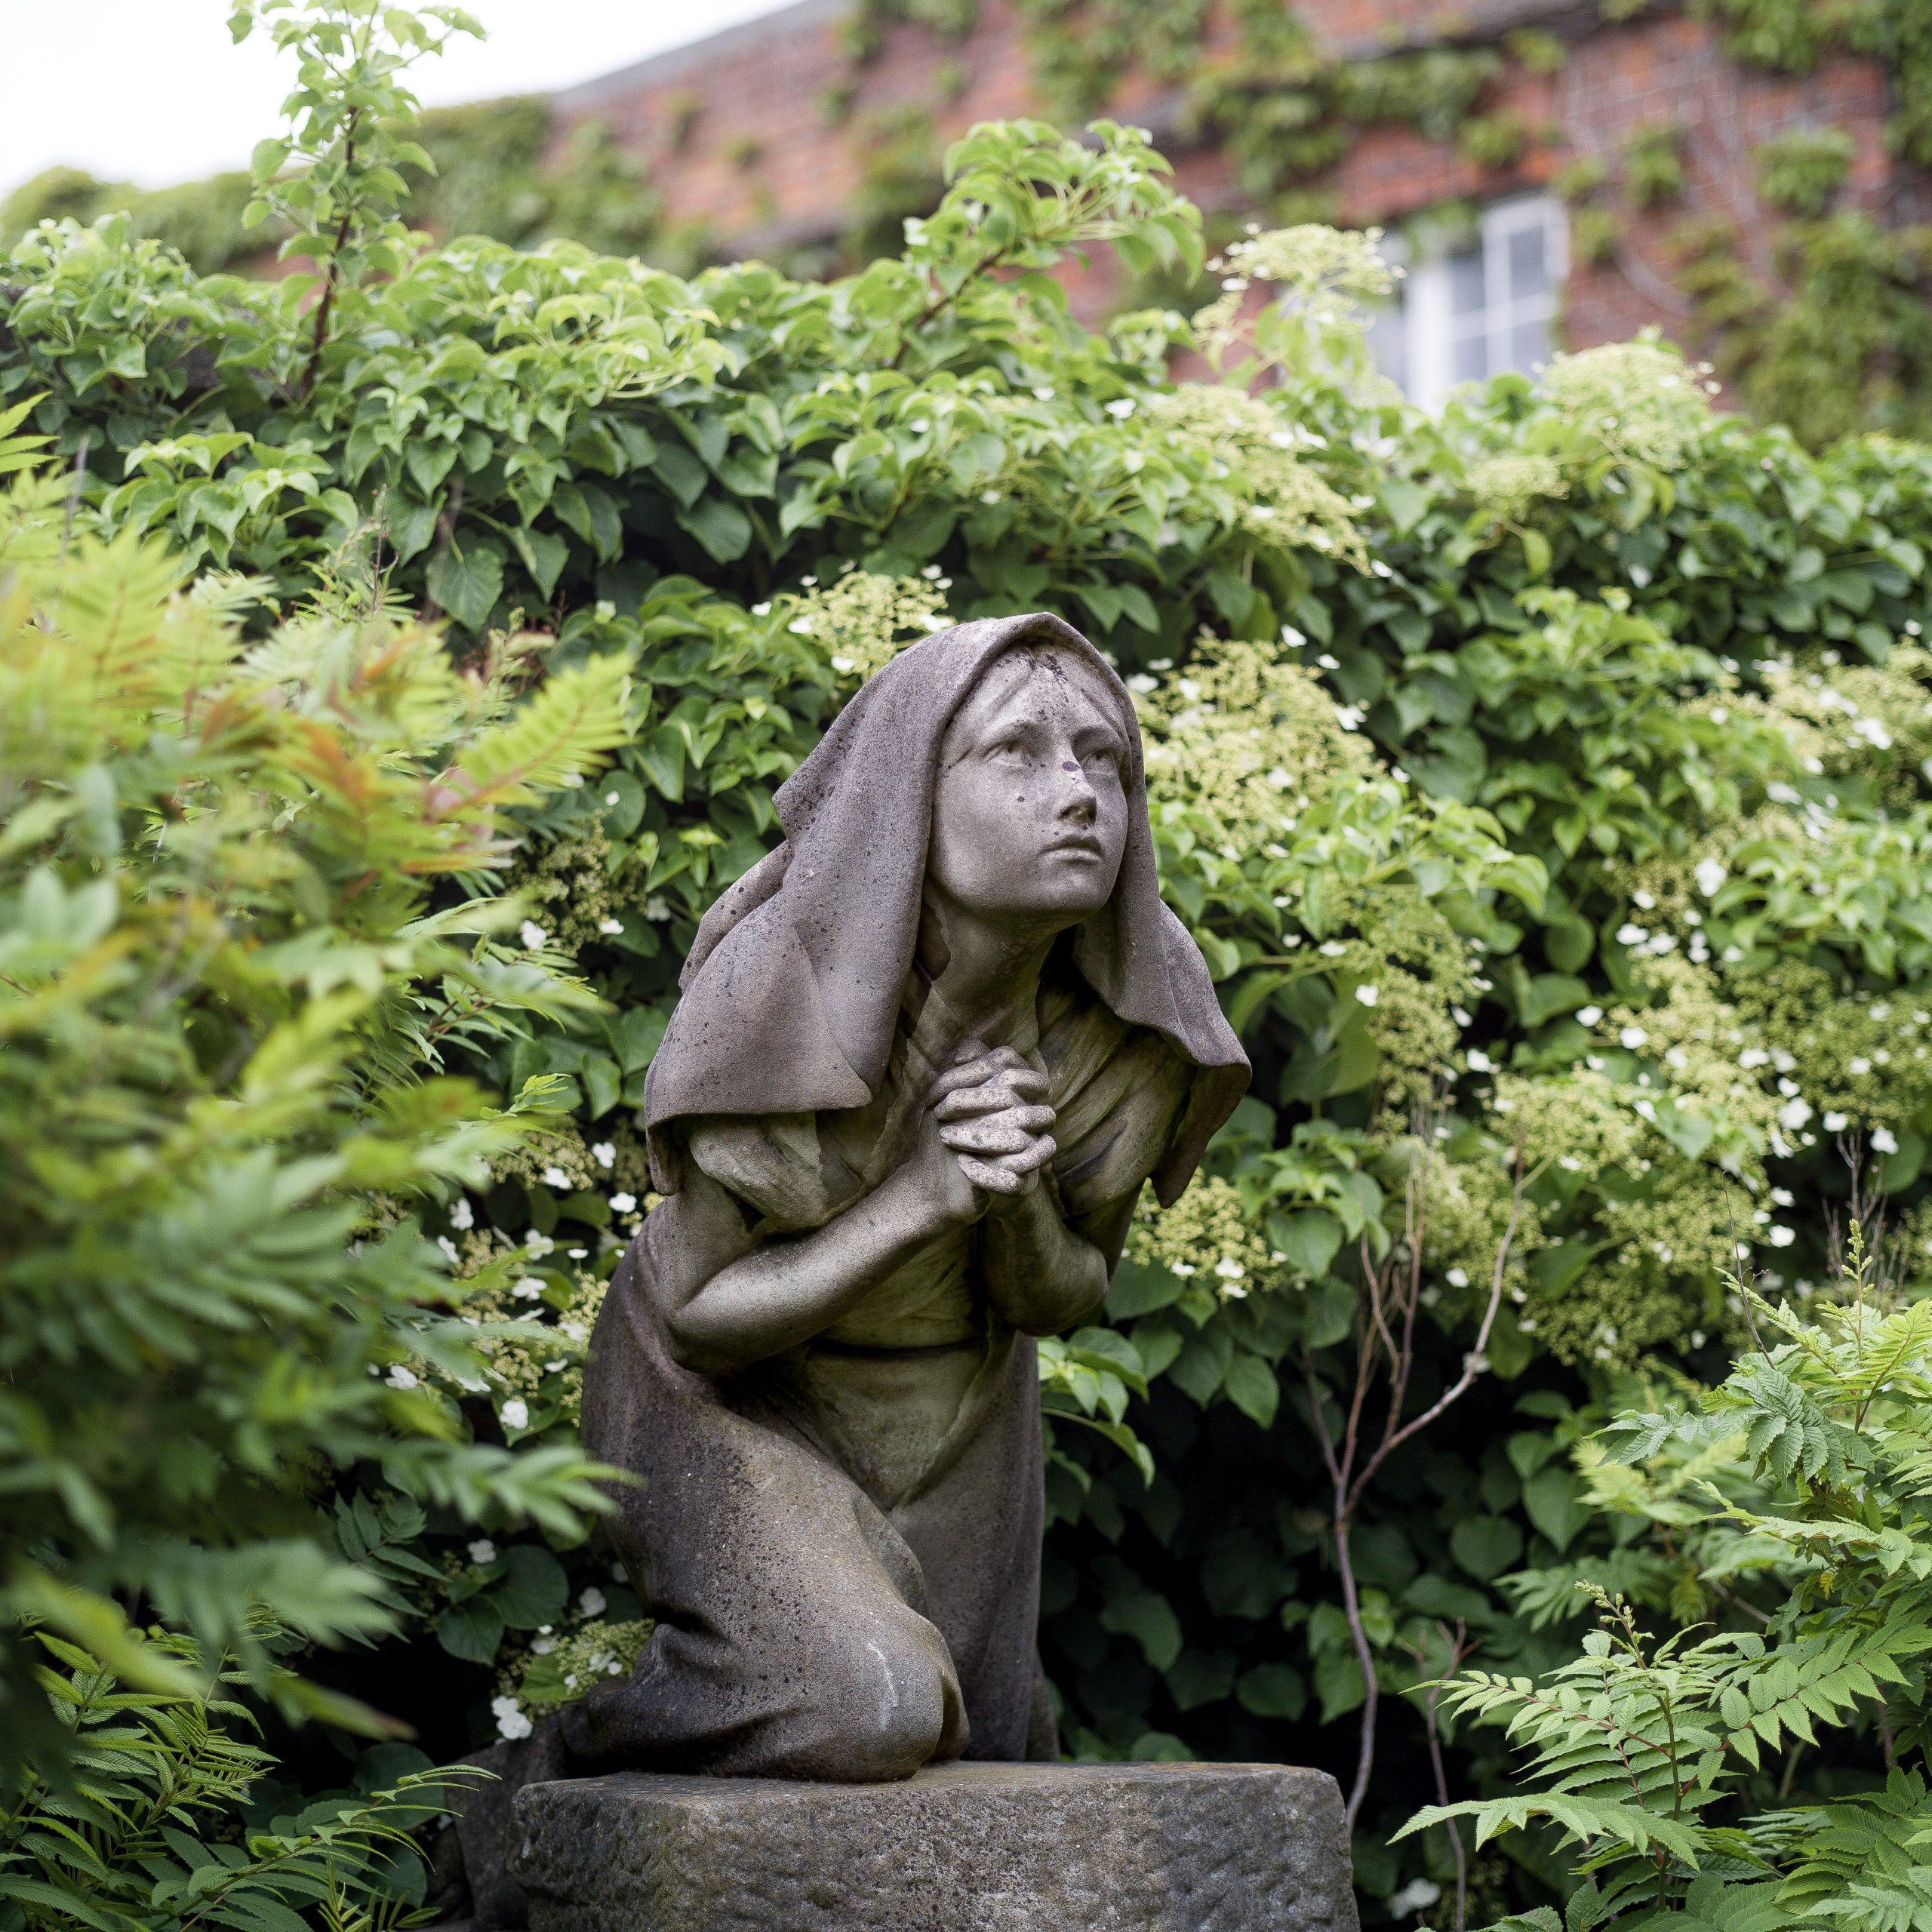
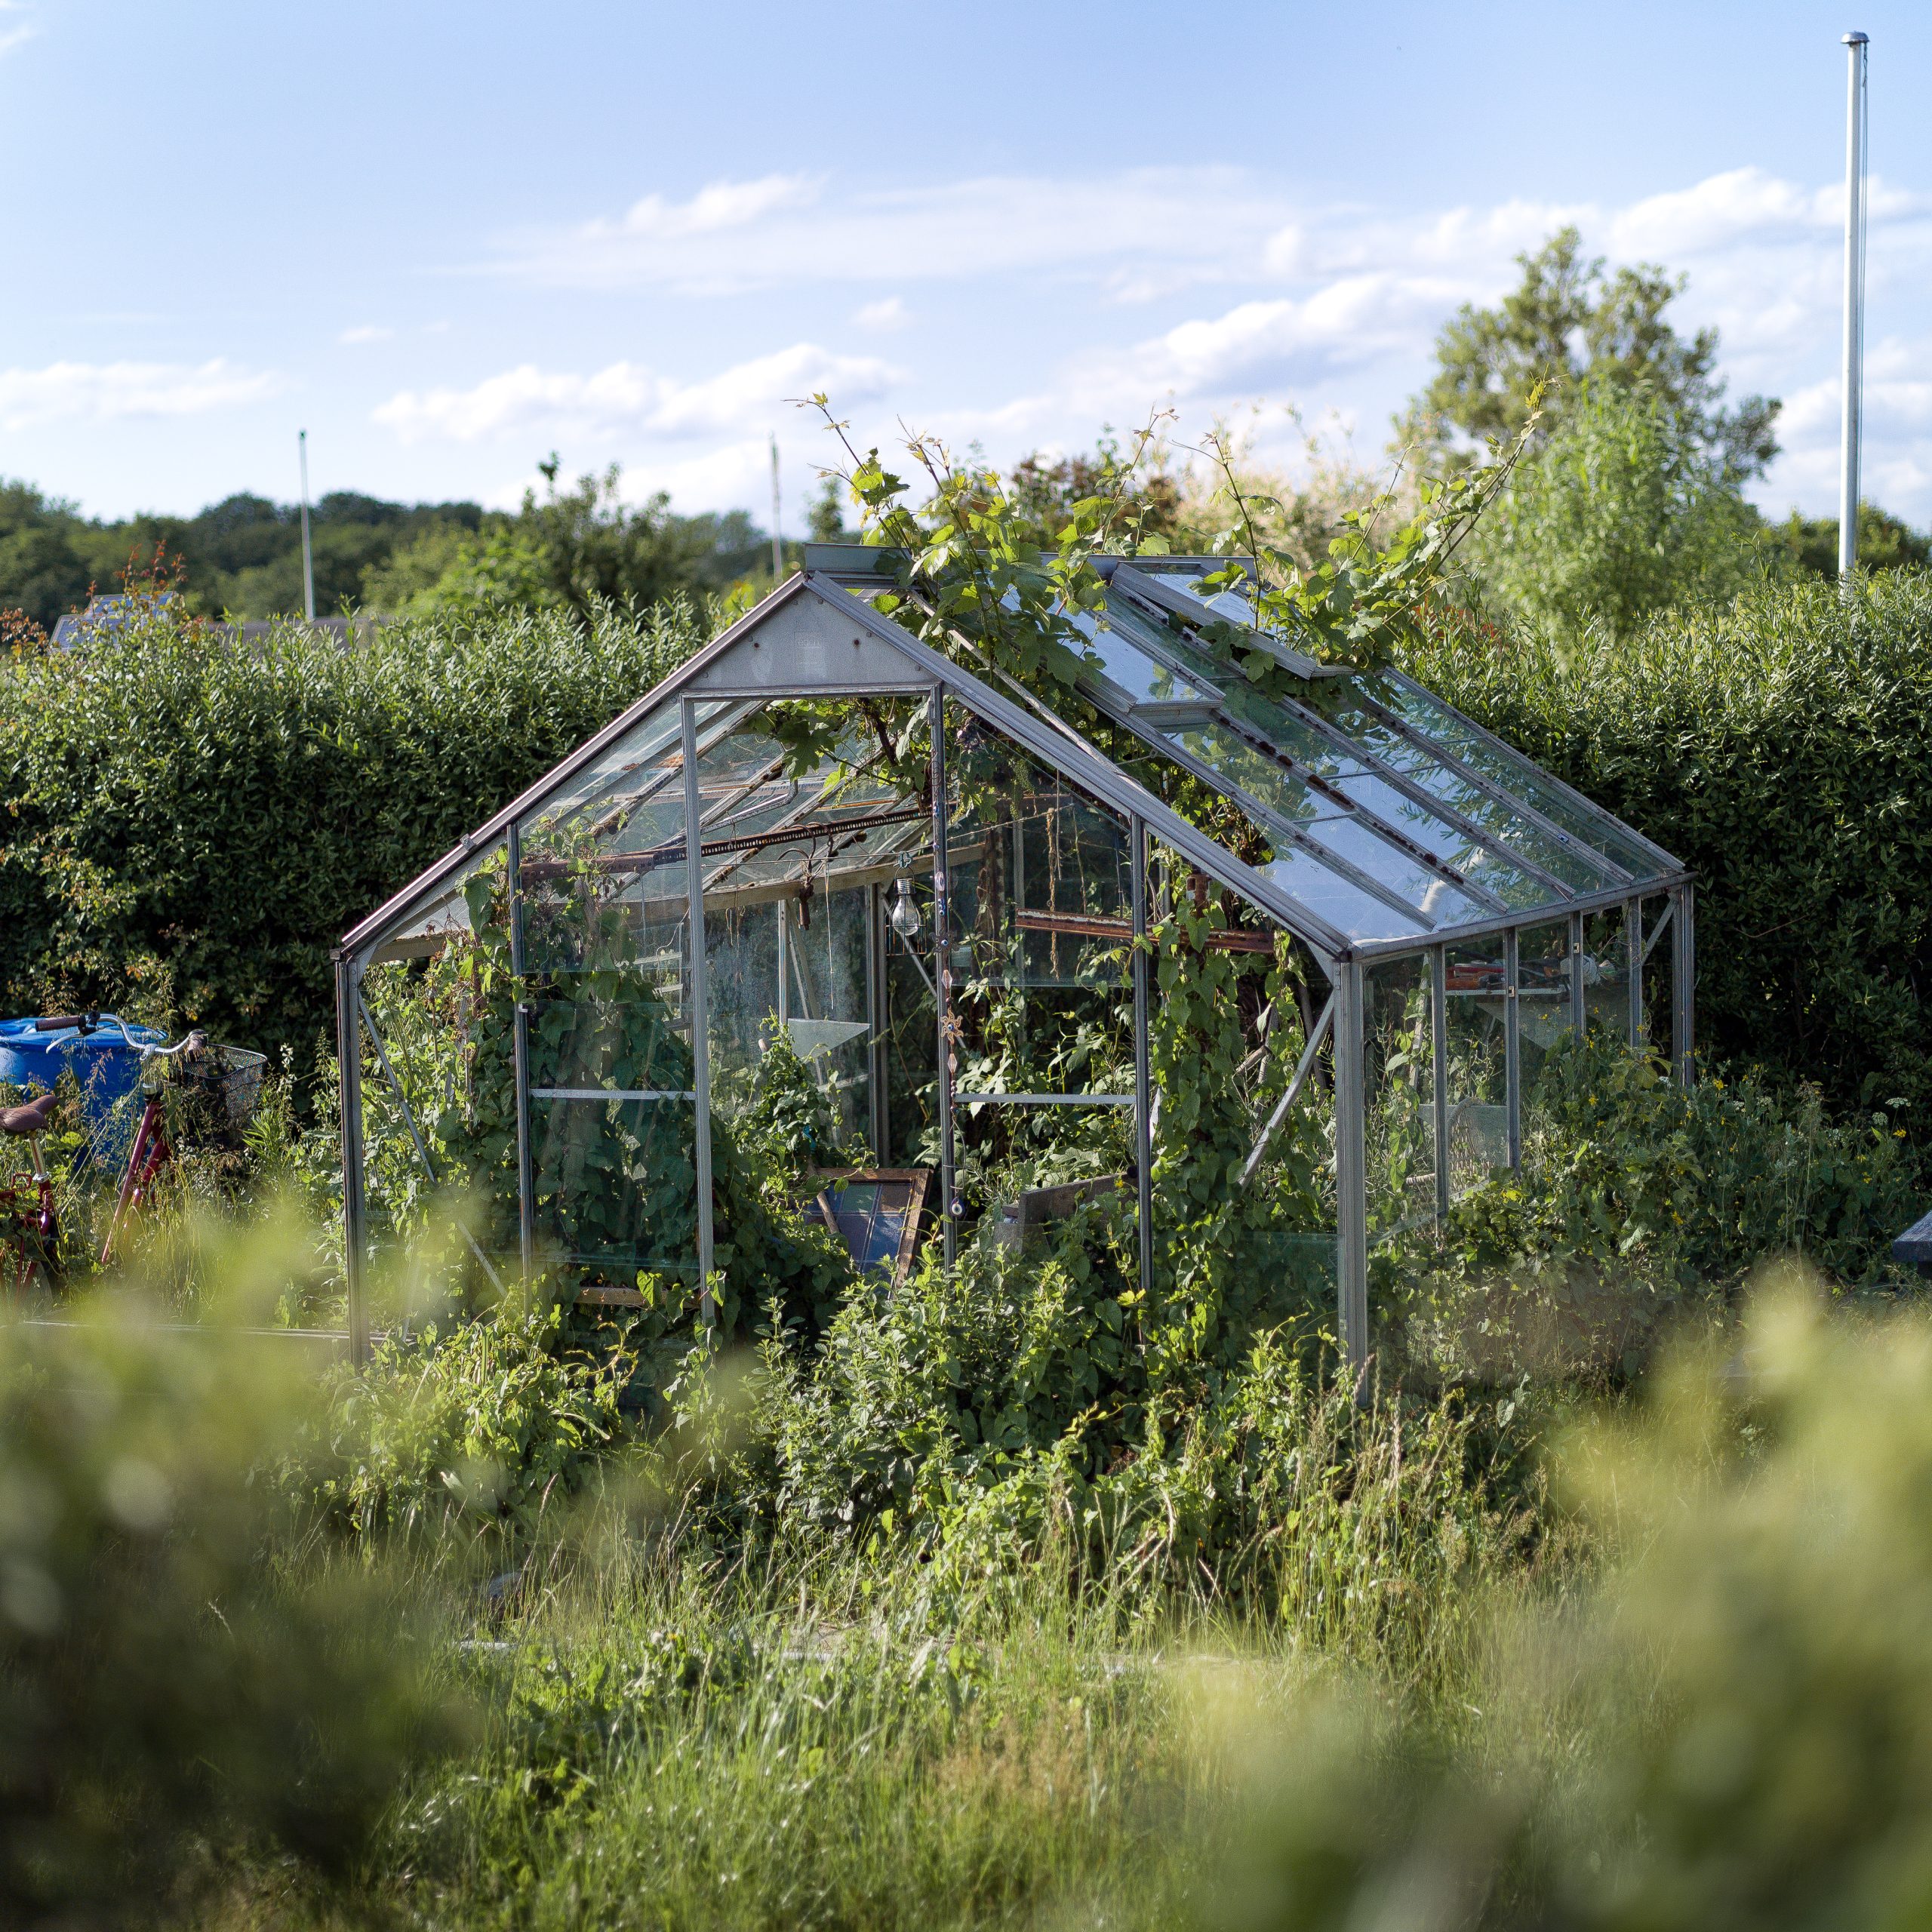
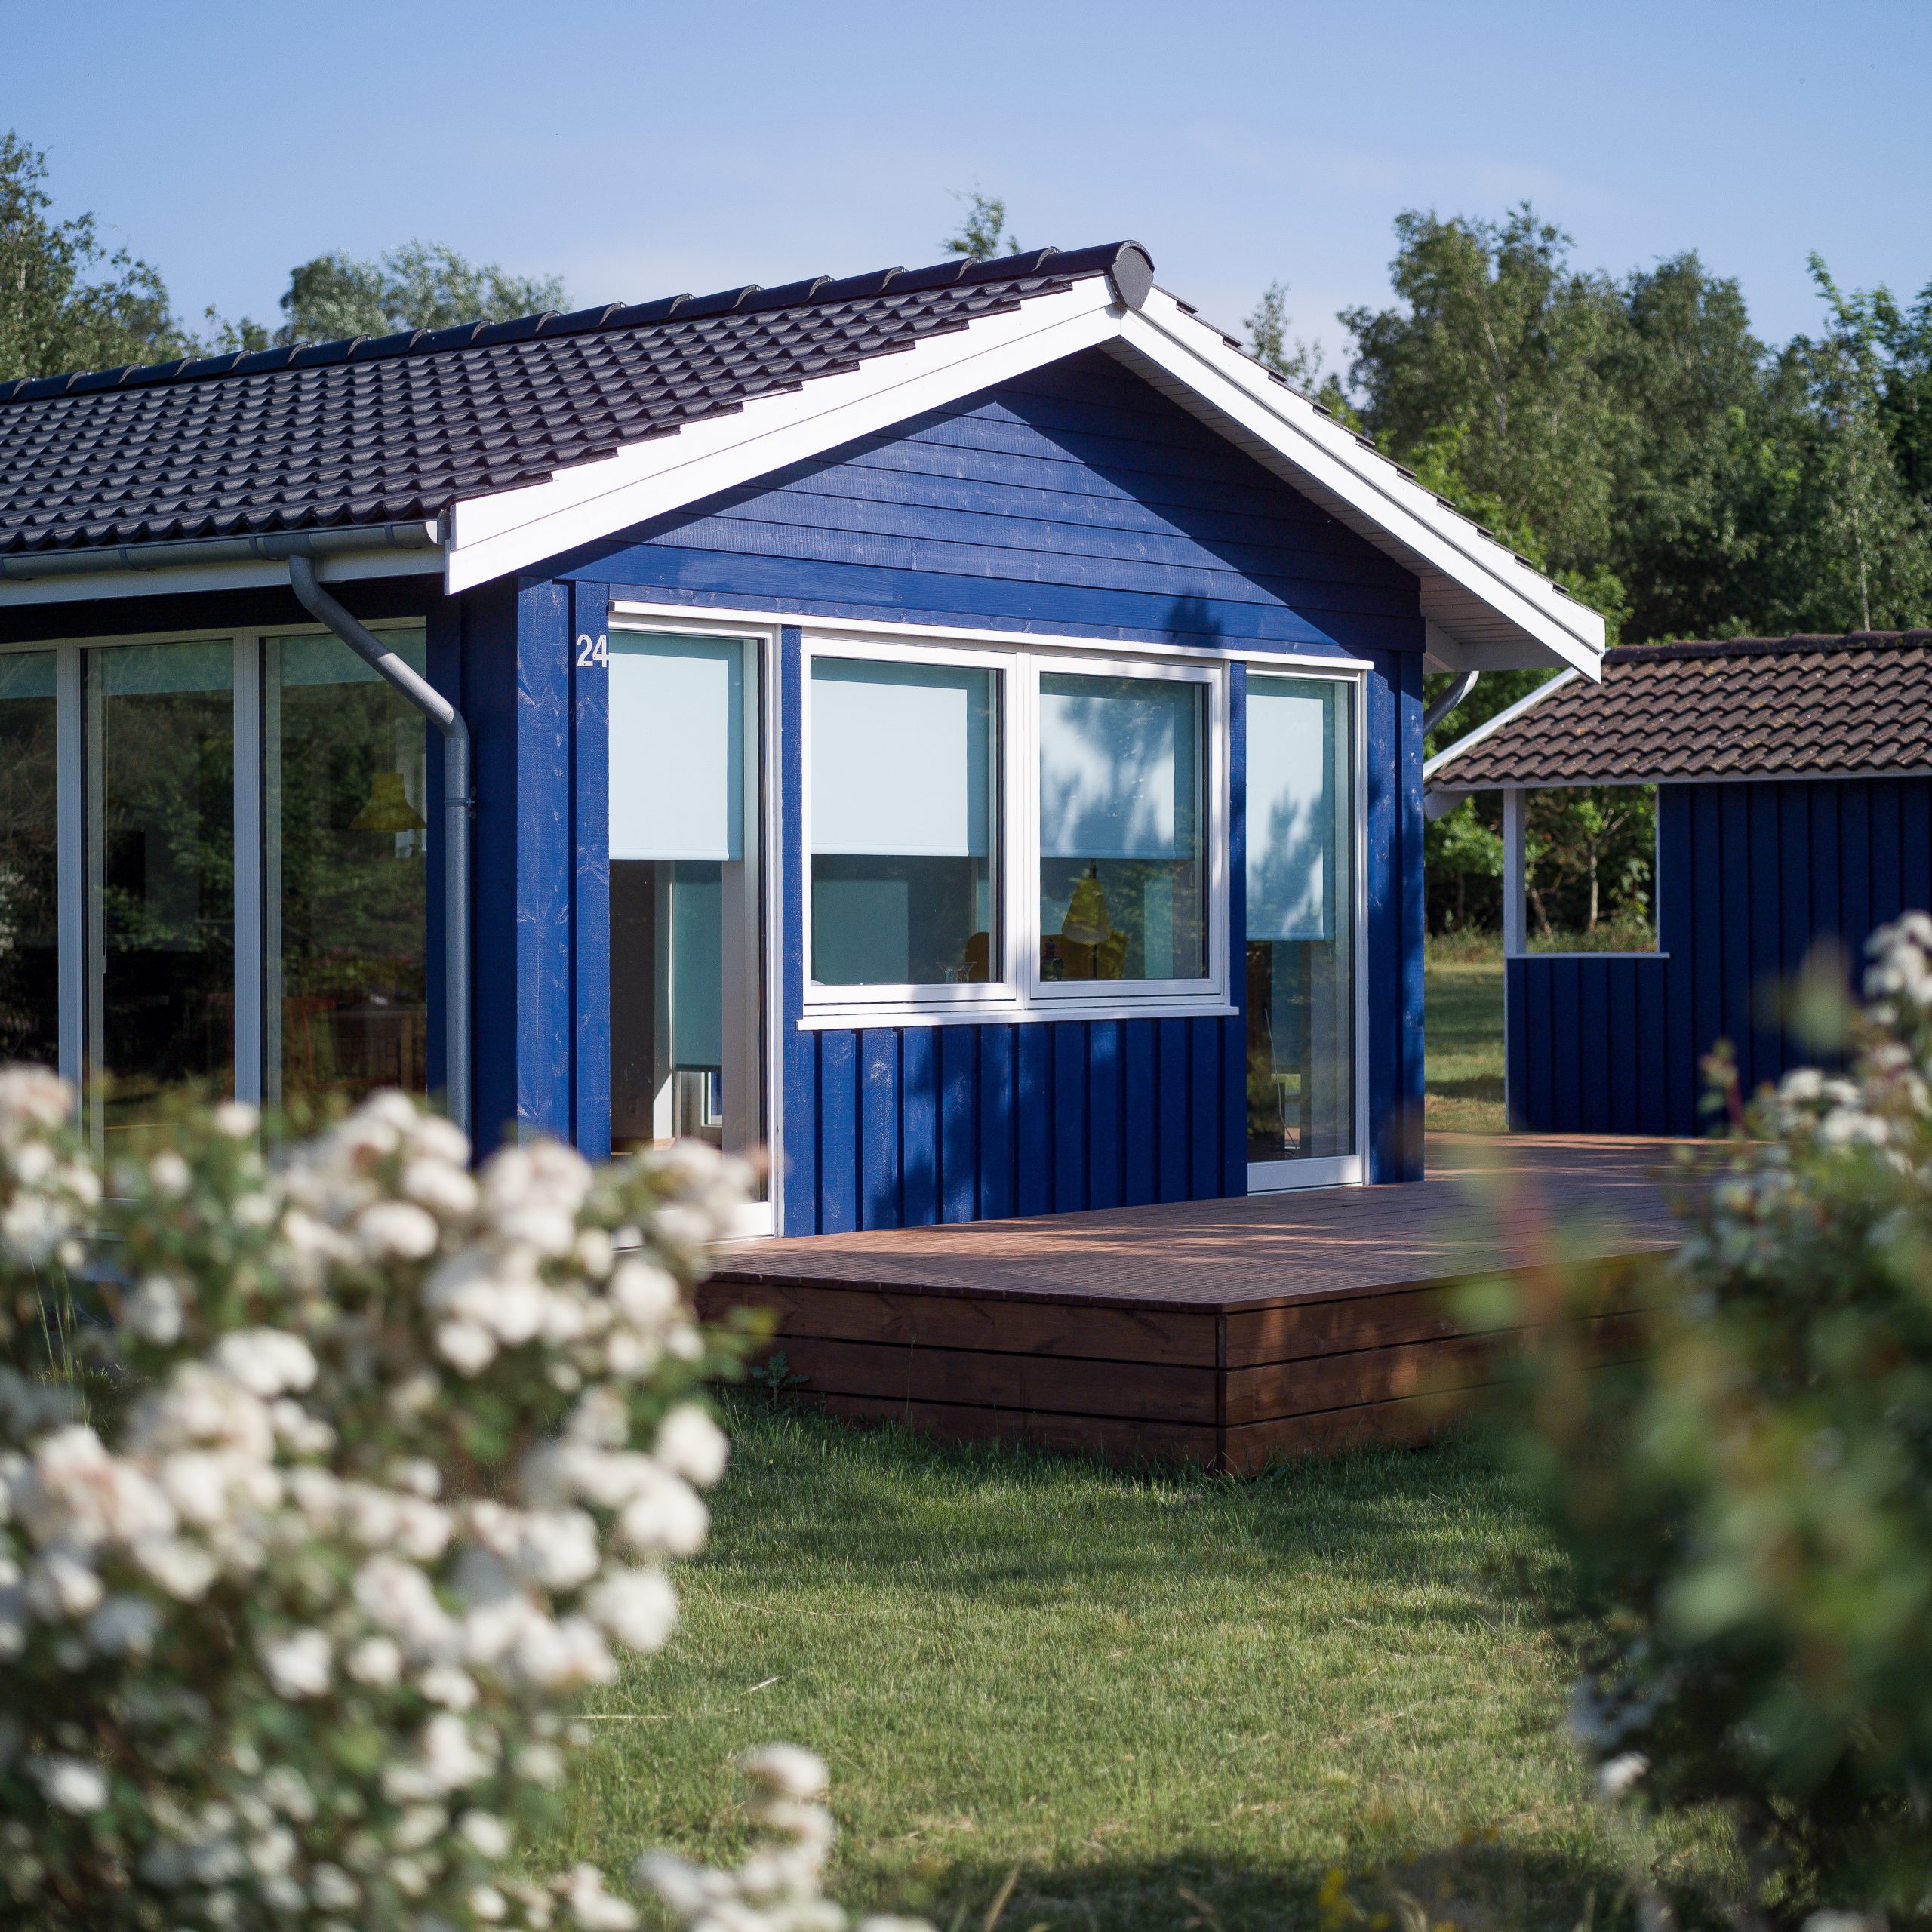
The image quality from this camera is very good. It gives a very clean look together with the amazing Kodak colors. Compared to Fujifilm’s digital cameras (my previous favorite when it comes to colors), the Kodak colors looks more like analog film, more organic. And it’s a bit like analog film where you sometimes take a photo and magical happens that you don’t expect from a digital sensor (there is this excitement of you don’t know what you are gonna get). The photos also has a bit of retro feel to it, so I mostly used the camera for more retro or kitch subjects.
Another pro is the sharpness, the Mamiya / Schneider Phase One lenses are very good, a more sharp look and more 3D-pop than I have had from any APS-C or full frame camera.
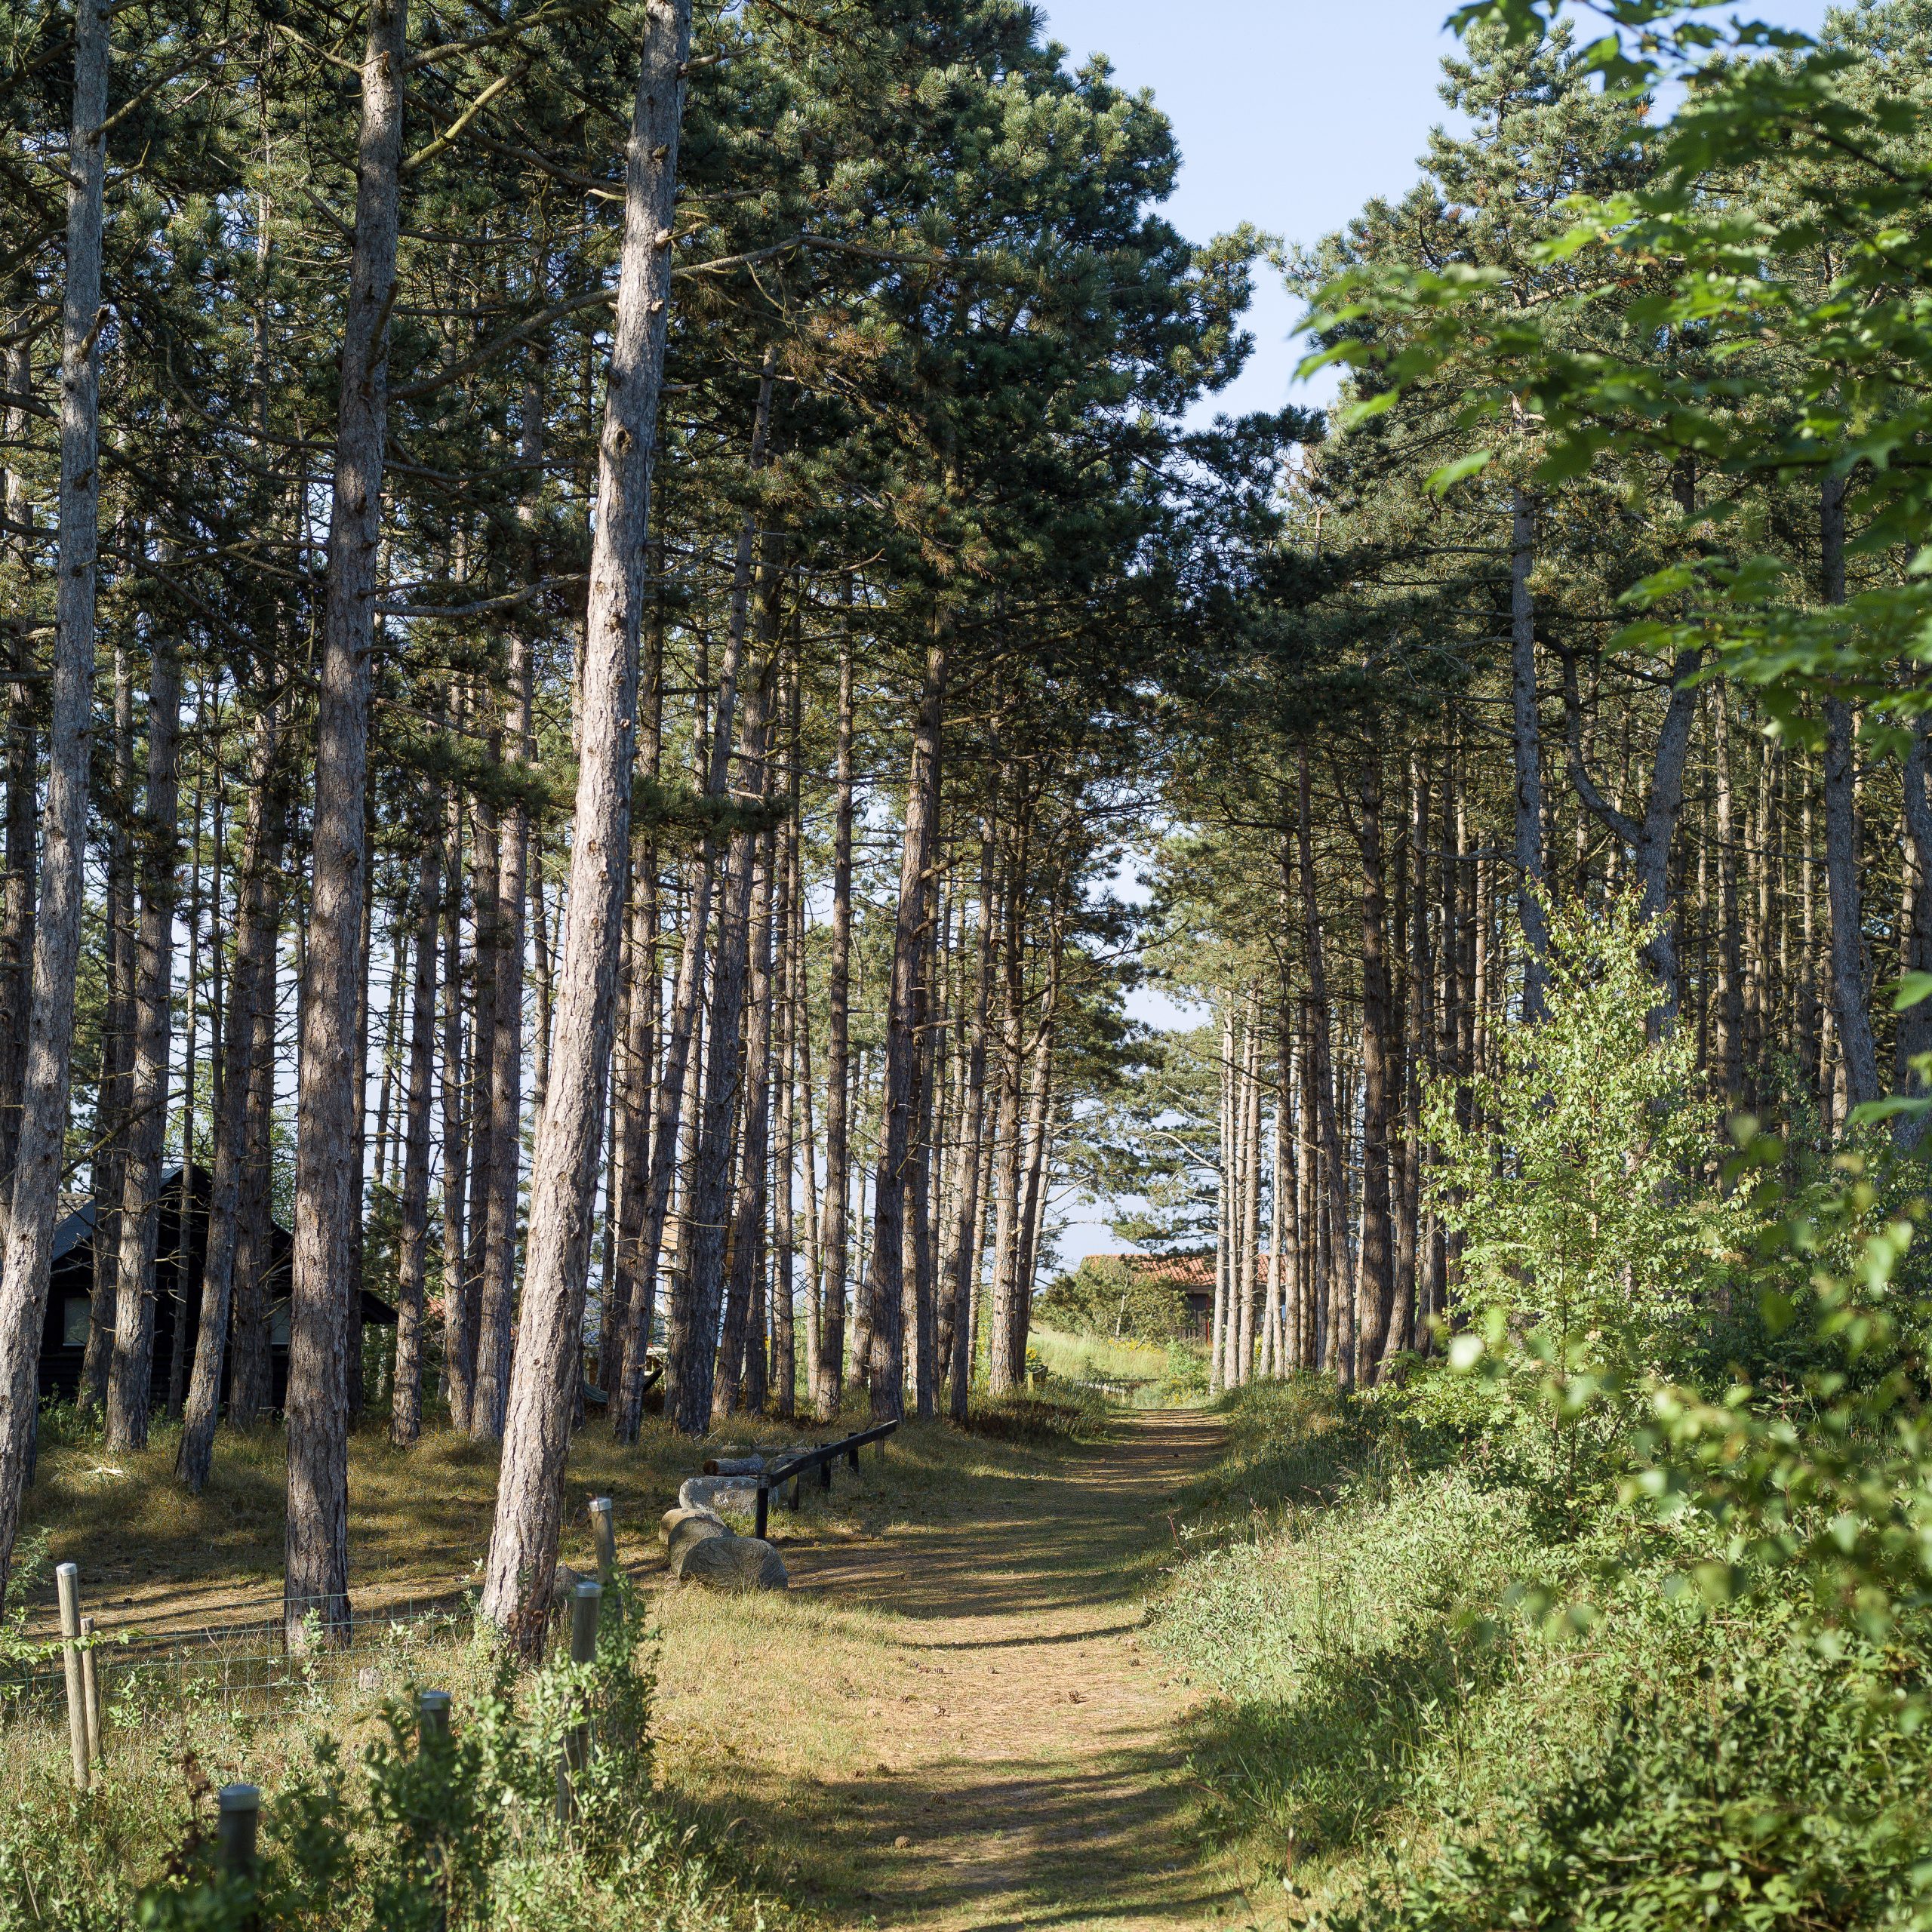
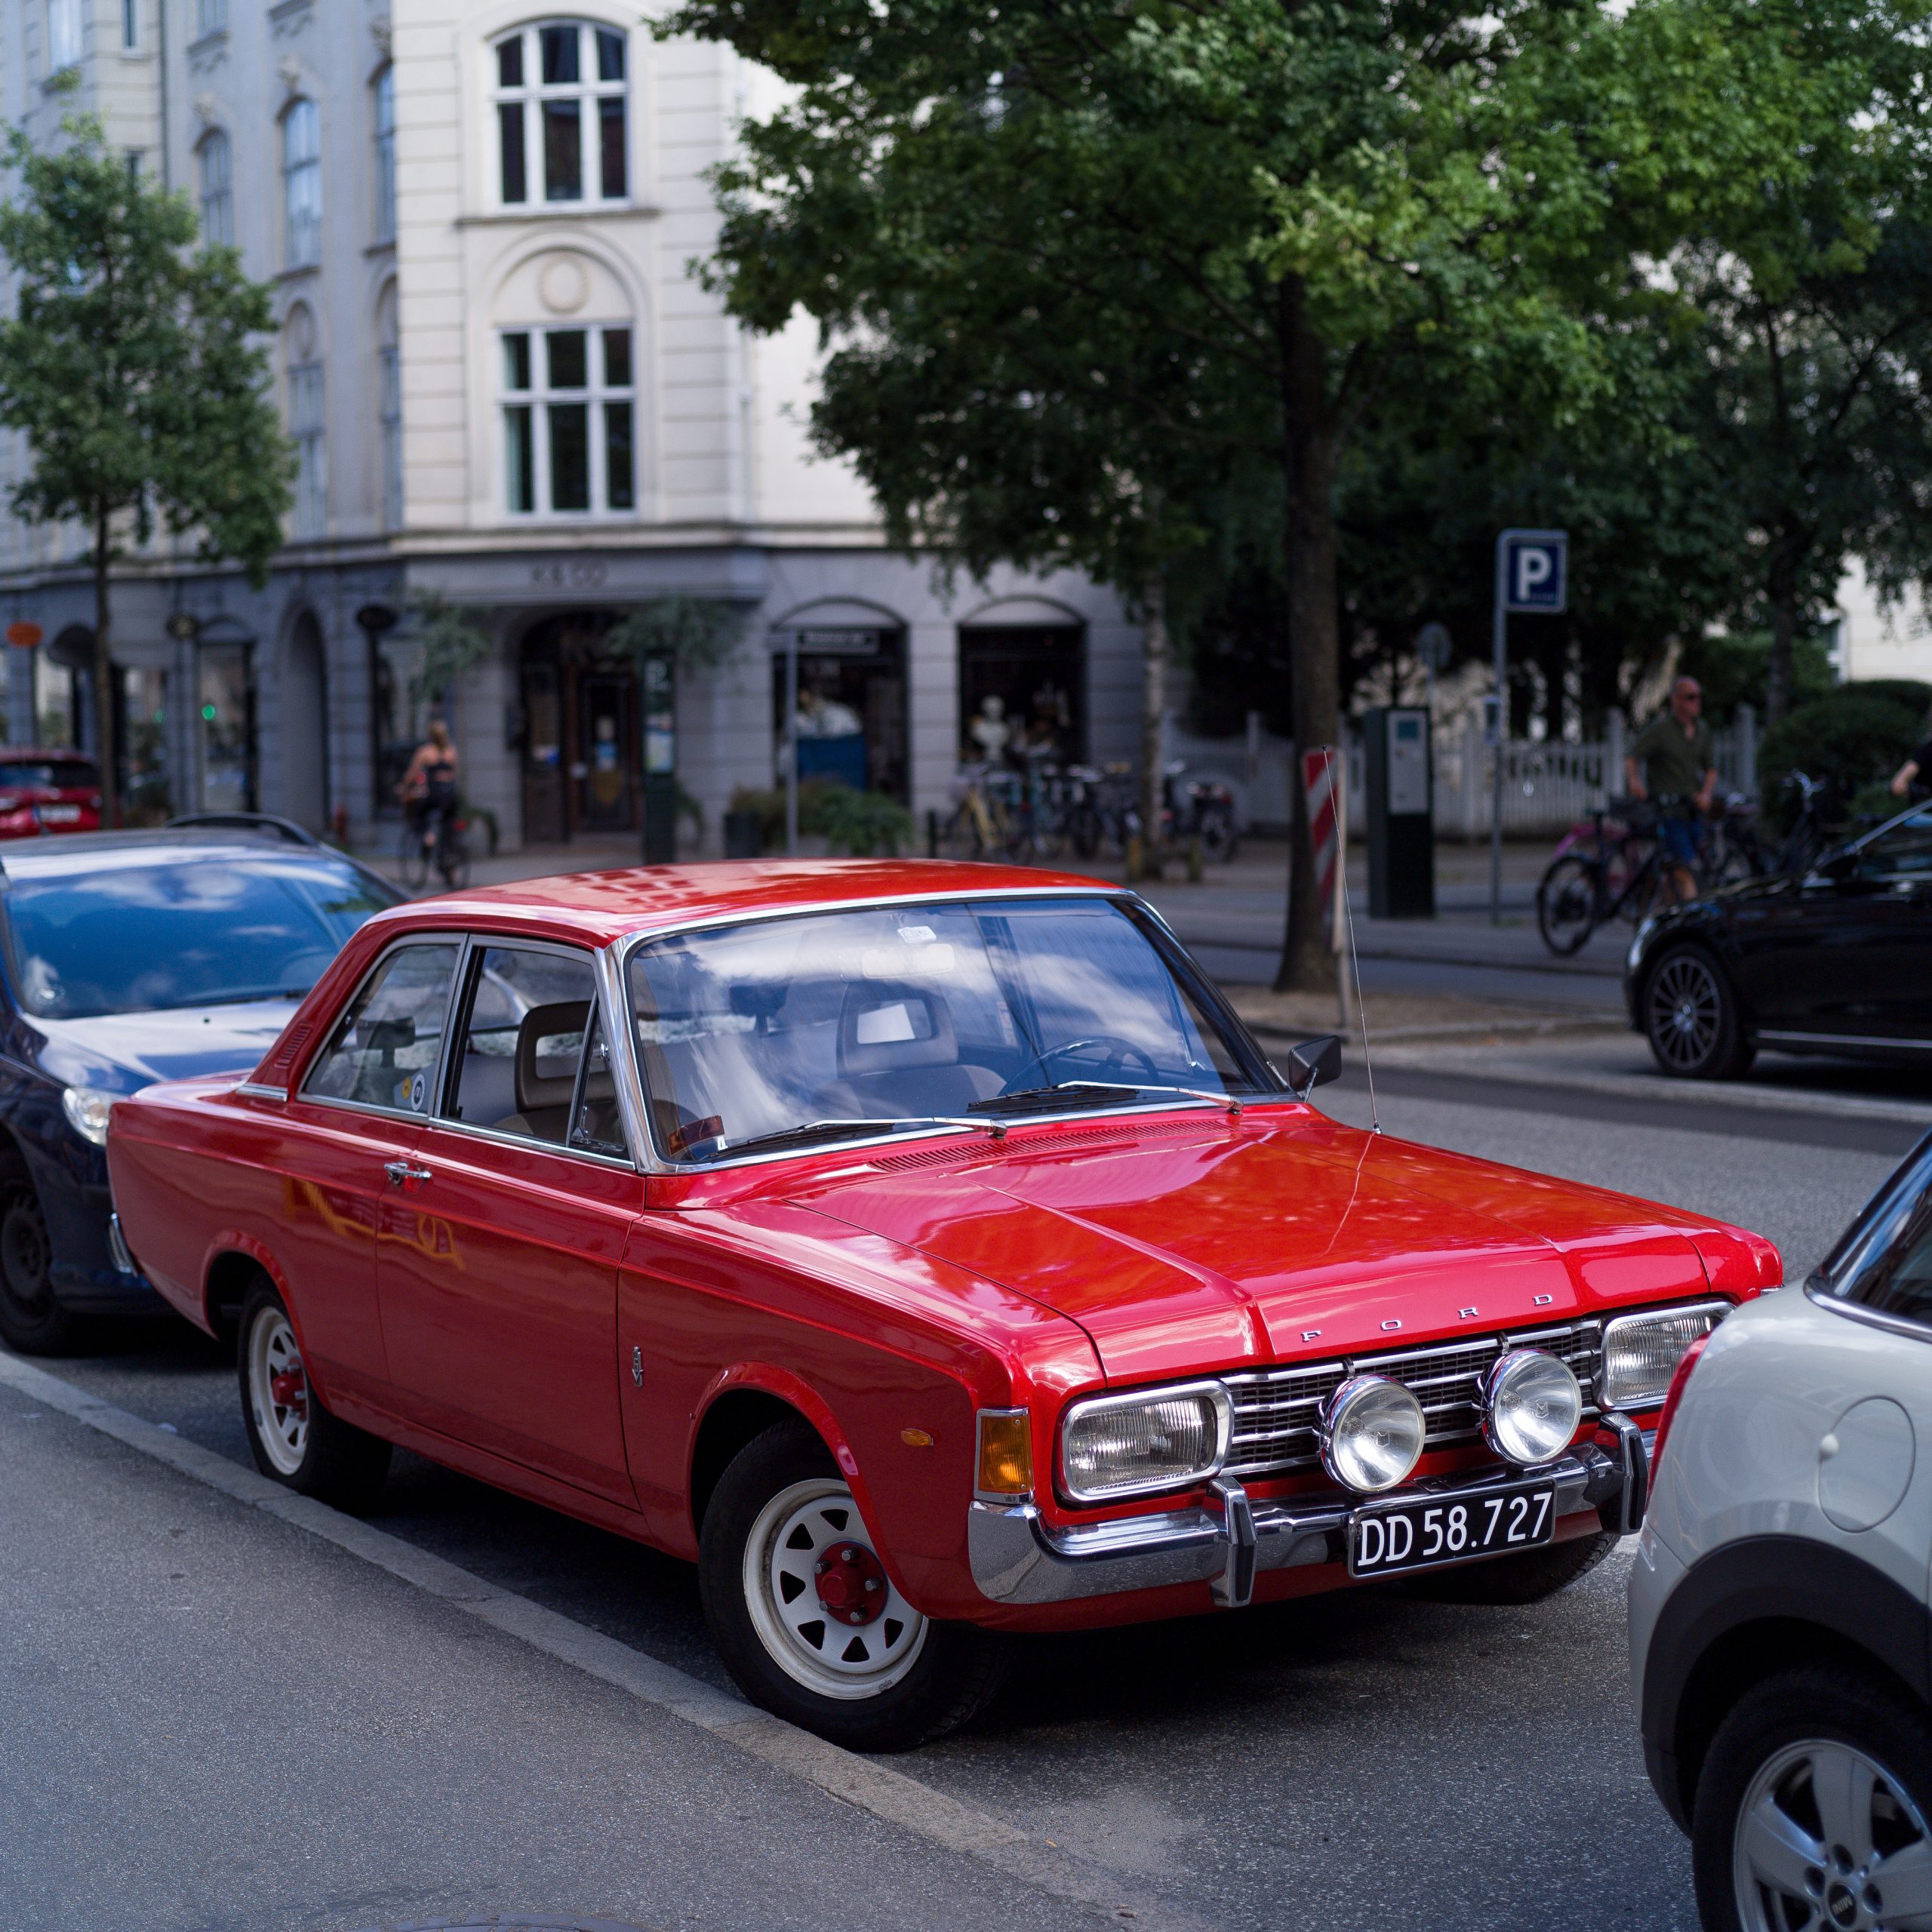
shot using Schneider-Kreuznach 80mm F2.8 LS
The interface on the Kodak DCS 645 Pro Back is very primitive, and almost makes it feel like an analog film back. There is a color screen, a few buttons, you can enter a menu, change settings etc. You can even view the photos you have shoot, but don’t expect getting anything out of that, the screen is so small and the colors are totally of. I use the screen to change settings, check basic framing and check the histogram, but hard to see if it’s in focus or not or if colors are good. It’s both good and bad. I wish there was a way of seeing you photos on the go. On the other hand it gives you that same feeling as when you shoot analog film, you have to focus on your skills and hope you capture the photo, making the hole experience a bit more exciting.
Like I mentioned in the beginning, my problem with digital cameras in general is that daylight photos looks boring. That’s also why I lately have been shooting at lot of night photos and I almost gave up on daylight photos. But this camera gave me the passion back, I brought it every where in daytime even though it is a very big camera. For this alone it’s worth all the money it cost me. And just to make sure, by daylight I mean in daytime but not golden hour or blue hour, a time of day where it’s normally hard to get photos to look interesting. Kodak DCS 645 Pro Back do well in daytime but of cause if the light is bad, it’s still bad with this camera. I have shot a lot of nice photos in direct sunlight with this camera, but I think it does even better in cloudy weather.
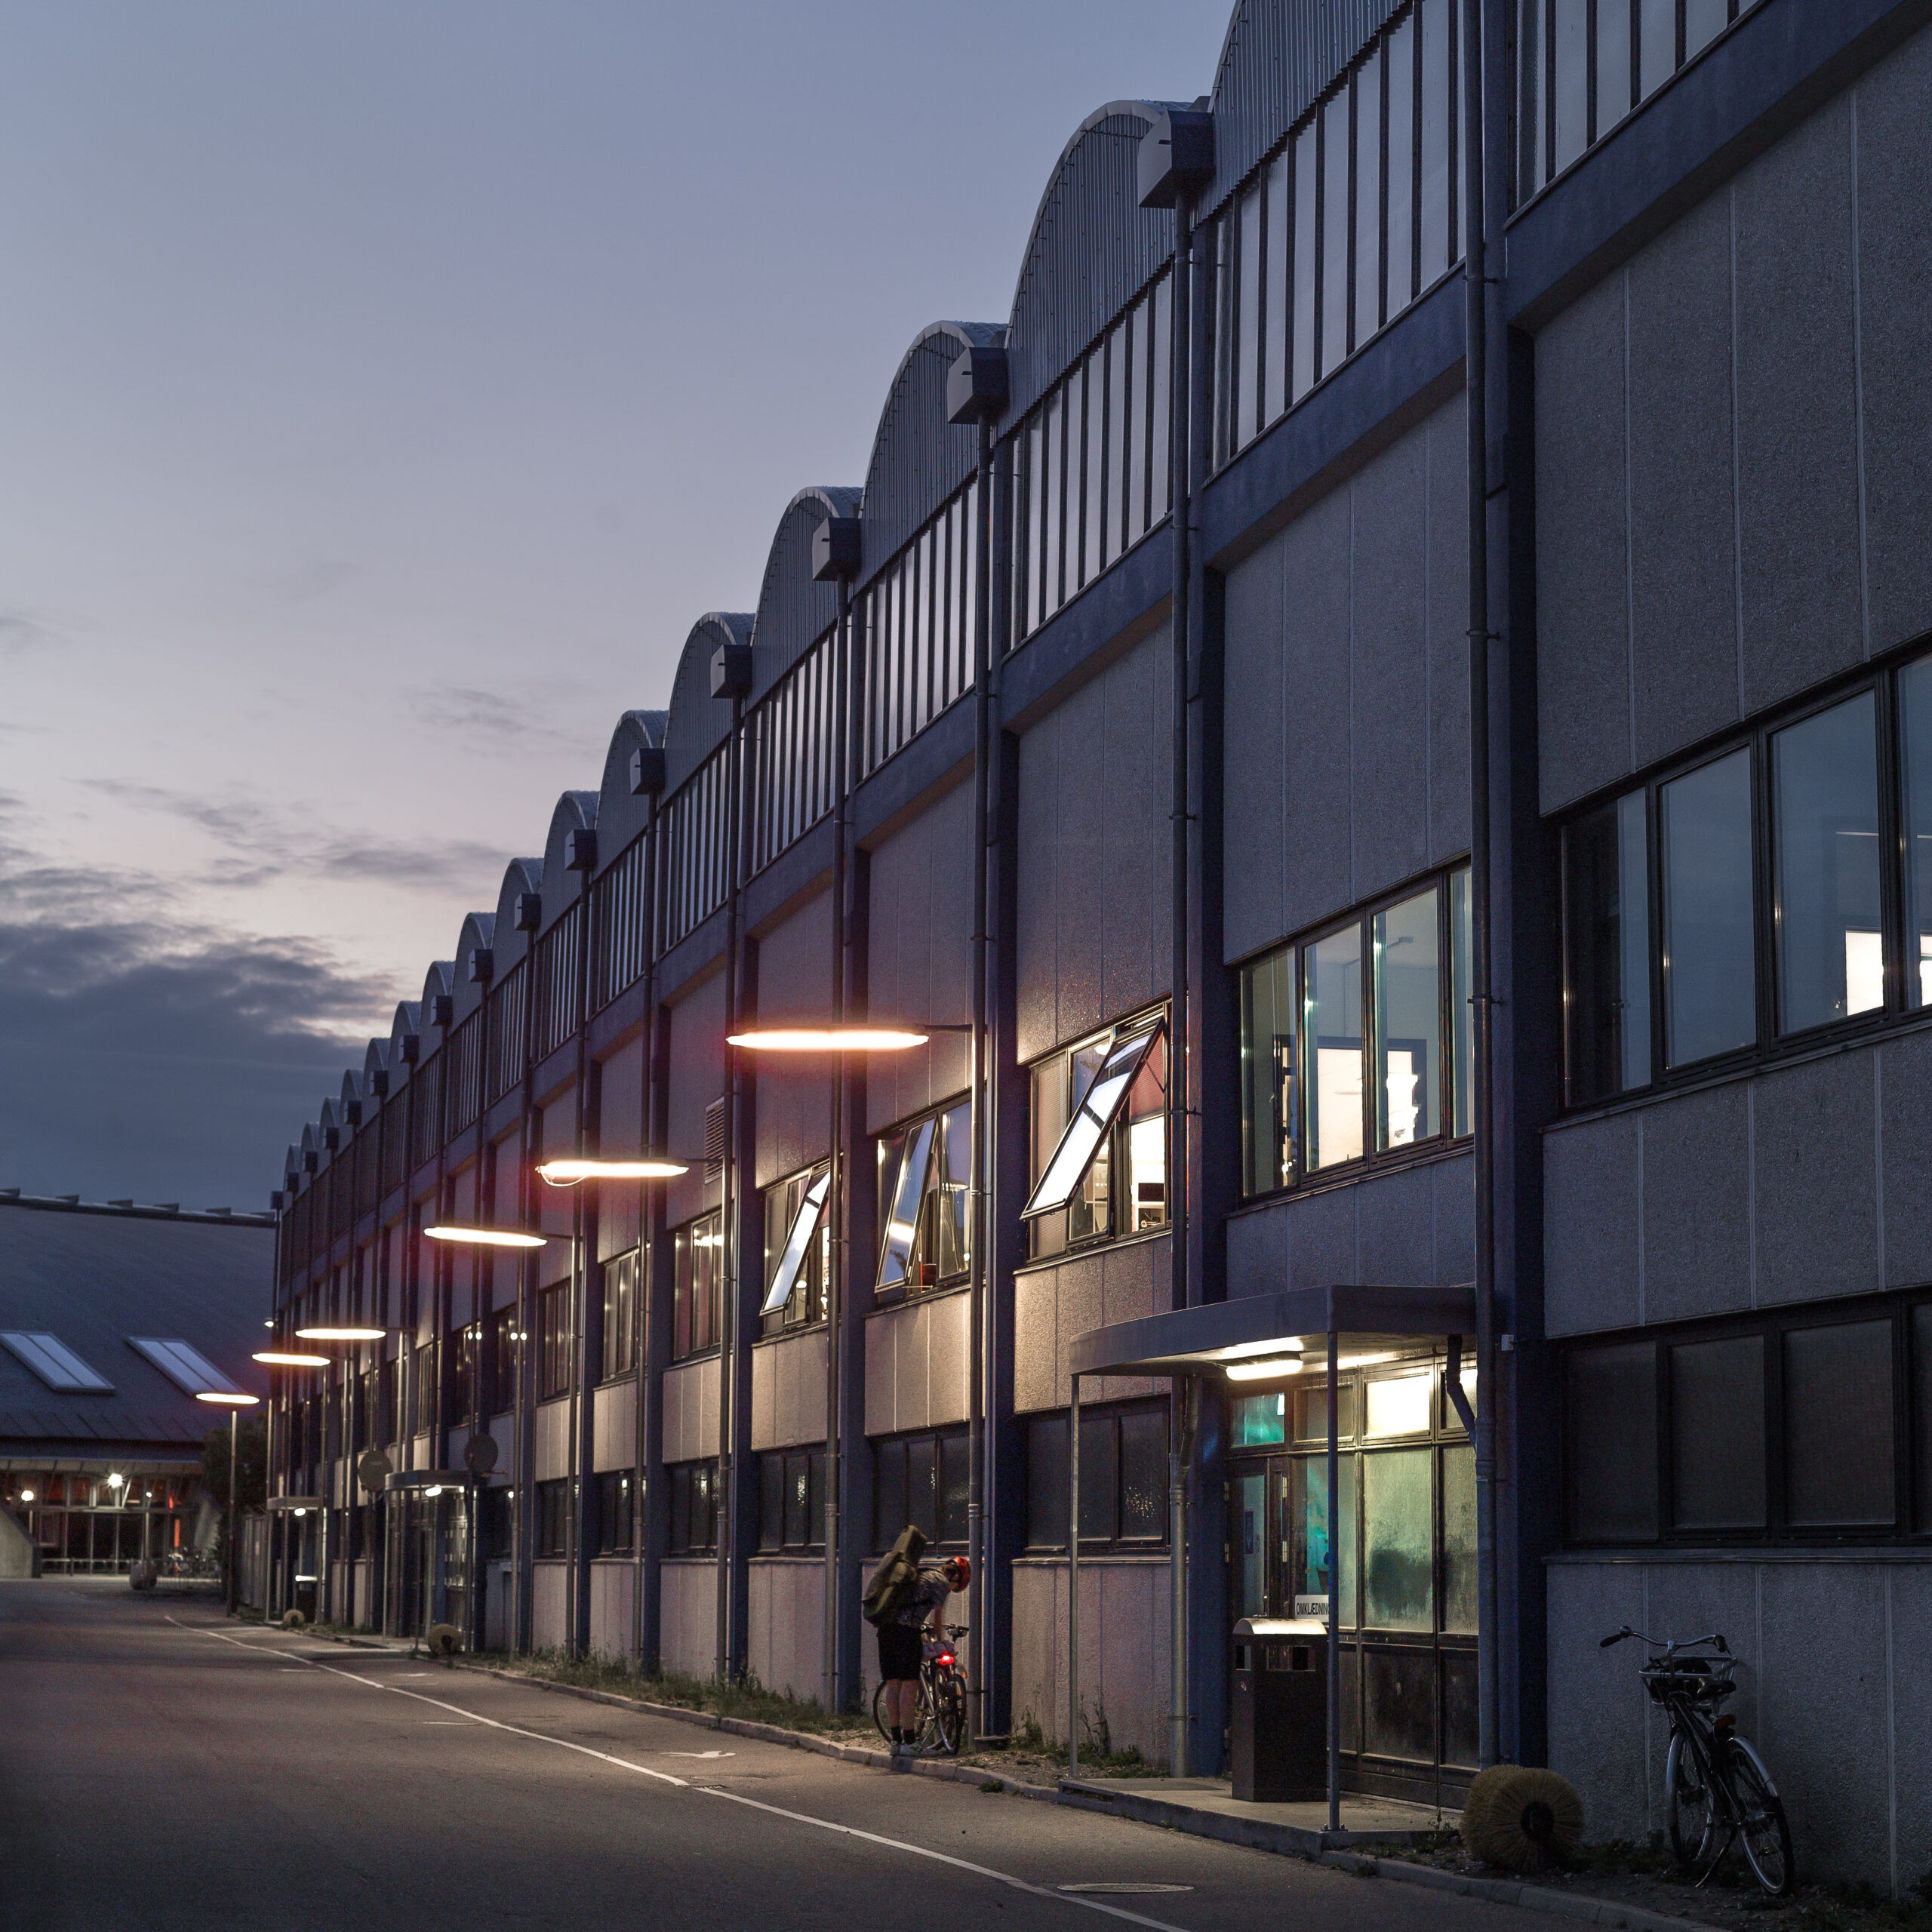
For nighttime and low light photos: of cause iso 100 is not low light friendly so you’ll need a tripod, but you can get some very nice results. There are some interesting effects with light sources that gets a halo around them (see photo below) that can be used creatively. The problem with nighttime photography is that the shadow recovery is poor compared to modern cameras, you get some very ugly noise in the shadows. I did have a bit of luck with shooting during blue hour (see photos below), after blue hour when it’s completely dark the contracts just gets too big for this sensor, for that modern cameras are better.

Square format of the sensor is good for isolating subjects (person or objects), but not good for landscape / cityscape because you get too much foreground (and often foreground is just dirt or road) or sky. The 3:2 format (that you have on APS-C or full frame) is very good for cityscape / landscape. Sadly it doesn’t look like any 3:2 medium format cameras exists, only 1:1 or 4:3. But I do really enjoy the 1:1 format for isolating subjects I find, you have to think a bit different and not use a to wide lens (80mm is my favorite).
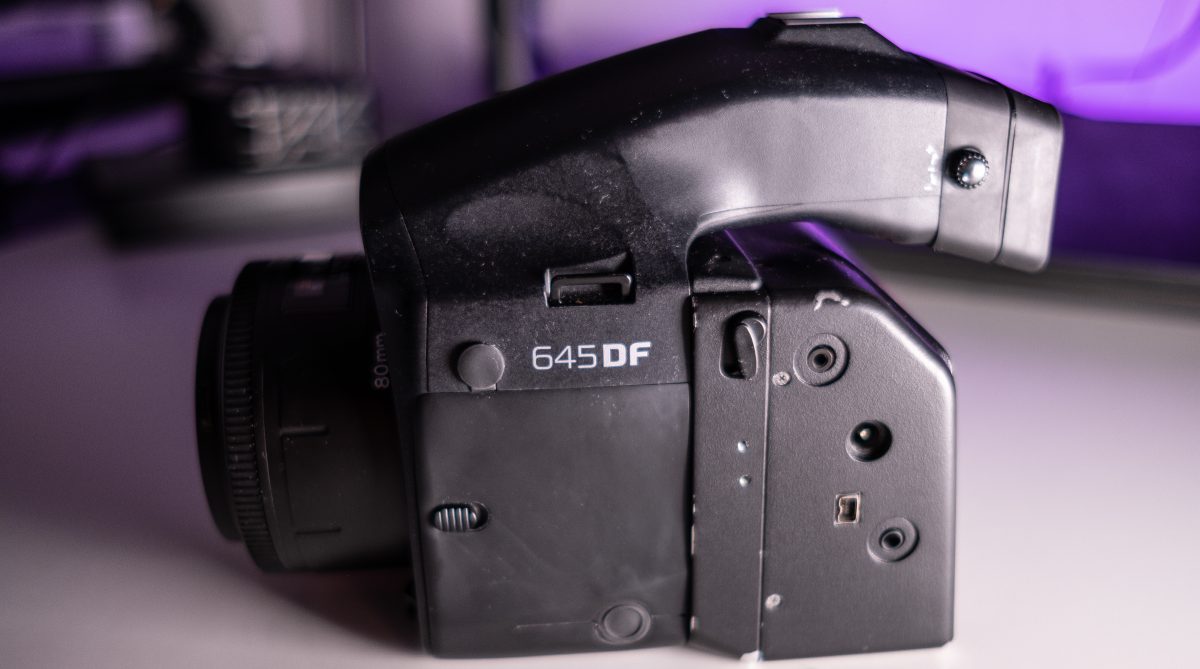
The Phase One DF that I ended up getting is a very good camera that I enjoyed using. It is very very big and heavy, but I still managed to bring it everywhere I went the last couple of months. People always mention that Phase One cameras are for studio use, not for outdoor, but it worked out ok for me. The Phase One DF has a lot of pro features that no other DSLR I owed had, i.e. when you setup a timer, you can pick how many seconds precisely, how many photos to shoot after the timer and how big interval between each photo. There is also the Phase One DF+ with faster autofocus and ability to calibrate auto focus for each lens, I might consider that one day. The newer and very expensive Phase One XF don’t support the Kodak DCS 645 Pro Back.
I made a test of the lenses I got, the Mamiya AF 80mm f2.8 [test photo here @f2.8] vs. Schneider-Kreuznach 80mm f2.8 LS [test photo here @f2.8]. The Mamiya is cheaper, based on an older (but legendary) lens design. The Schneider-Kreuznach is newer, a bit more expensive but not much, a bit faster auto focus and has leaf shutter in the lens (so good if you do flash photography). I tested both lenses. Shooting the lenses at f11 doesn’t show any difference. Shooting wide open at f2.8 they are also both very good, the Mamiya is a great lens, but the Schneider-Kreuznach a tiny bit better. Center sharpness is good on both (maybe a hair better on the Schneider but you have to really pixel peep), but the corners are a lot sharper with the Schneider. But do you really need sharp corners when shooting wide open? Schneider lenses might be worth it for more modern high resolution digital backs, for the old Kodak back it’s probably not worth the tiny amount of corner sharpness boost and bigger size. I recommend to get the Mamiya AF 80mm f2.8 to start with, might be the only lens you will ever need.
There is also the older manual focus Mamiya 645 lenses, like the famous Mamiya 80mm f1.9 lens. I have seen some people use that lens with the Kodak Pro Back with great results. Seeing if the image is in focus or not through the viewfinder is too hard, there is a focus confirmation beep but that was also hard for me to find. I tried to install a split prism screen, it didn’t work on my Phase One DF but did work on my Mamiya AFD II, and that made it easier to focus. The Phase One DF also had problems with the metering (people reported the same), the Mamiya AFD II didn’t have problems. I tried the Mamiya FD402 Viewfinder Magnifier to help with manual focusing, it helped but is a bit clunky to use, and I would not use it for walk around daily shooting. Like I mentioned looking at other peoples photos the 80mm f1.9 gives some amazing results, but it is hard to use and maybe not worth it.

Common Technical Challenges
I had these problems when using Kodak DCS 645 Pro Back, here is how to get around them.
- Battery drain is a problem, so I unplug the battery when not using the camera. I think the digital back is always charging the internal clock battery, that might be one reason for the battery drain.
- Long exposure shots take long time and might make the camera think the digital back stopped working. That is because after 1/4 sec (can be configured in settings) the camera takes another black photo to retract noise grain from the original photo, and because of the slow cpu on the digital back, it takes a lot of time (30 sec or so) and also drains batteries fast.
- It’s hard to frame your shots, the Phase One DF viewfinder matches with top and bottom of your photos, but the viewfinder is not square so you won’t know where your photo left and right side is. Alexey Danilchenko made some custom framelines you can print on transparent plastic and put into your viewfinder, get them here. The Phase One P20 has the same sensor, so I ended up ordering a viewfinder mask from here.
- There is an internal clock battery – it’s Panasonic VL-2020 rechargeable battery, that recharges when the camera is powered on, but the charging is very slow.
- Some Phase One DF’s has a firmware version that doesn’t support the Kodak 645 Pro Back. You can update the firmware with a Phase One digital back, or a cheaper solution is to get the Phase One V-Grip Air. Plug in the usb cable into the grip while connected to the camera. Run the Phase One firmware updater, drag n’ drop the firmware file on to the program, and flash it. Phase One DF+ don’t have the same problem (as far as I know) but I’m gonna share the newest firmware for that camera here also. Files have been removed from Phase One’s servers, so I will share them here on my site:
» Download Phase One Firmware Updater 3.4.0.54 for Windows – Firmware Updater.Win.3.4.0.54.exe
» Download Phase One DF 1.58 Firmware – 645df_family_0158.fwr
» Download Phase One DF+ 2.31 Firmware – 645DF+_Family_0231.fwr - After writing this post I found out that there seem to be different IR filters, I bought another Kodak 645 Pro Back and it came with an IR filter that gave very different colors. One filter gave me very blue colors and one gave me very yellow orange colors (and not something to just adjust in the raw files). I cannot see any different on the filter so not sure what’s up with that.
- The back LCD panel will get more and more dim over time until you will not be able to see it. Alexey has also made a solution for this problem, which is to install a new backlight led light behind the LCD, check this Github for more info. My Kodak Pro Back’ displays are still ok, but I will also try to make the installation soon.
- This is an old camera so the battery cell will be dead by now if you buy one. A lot of people seem to had got their batteries recelled back in the days, with serveral companies offering that service back then. Today your only option is to do the battery recelling yourself. You will need 2x 18650 rechargeable lithium batteries for each battery pack, I used Molicel INR18650-M35A (because they performed high in benchmarks), I can see online that others have used Panasonic NCR18650B. Open up the battery pack with a knive, this part can be hard, get though the old glue and pull the knive back and forth, when you have moved the knive all around the battery pack try to open it. Remove the old cells and clean the circuit board from left over nickel strip. I first added some glue (don’t use contact / super glue in case you have to redo it) and I mounted the circuit board in the bottom of the battery case, make sure the contacts sticks out (this part I failed at first and it didn’t reach the digital backs power contact pads). Then I used a welding tool (I bought a cheap one from China, remember to use welding not soldering, soldering might kill your battery cells with the heat) to add nickel belt to the 3 points on the circuit board, and then I added batteries and nickel belt to them (take a photo of the batteries before you disassemble them incase you forget, if you make wrong connections lithium batteries are very dangerous). Then maybe add some electrical tape for protection, and close it up with some glue. Mine looks ugly ass hell because of my poor knife and glue skills, and I’m considering if I should make a 3d printed case where it’s easy to swap those 18650 cells, maybe a project for the future.
- Glitches or static noise photos (like the ones below): The problems is related to the old CCD sensor. The sensor gets turned on when you half press the shutter and is only kept alive for X sec. (configured in the menu -> “Soft Press CCD Active Time”). If you pass that time and take the photo, the sensor will be full of garbage data and you get these kind of images. Look up the Soft Press CCD Active Time property on Alexey Danilchenko’s GitHub for more info.


Tips
- Custom firmware: the first thing you should do when you get a Kodak DCS 645 Pro Back is to upgrade the firmware. Alexey Danilchenko have managed to make a custom firmware with a lot of new features and settings. This firmware i.e. enables you to use Phase One cameras not only Mamiya. Big thanks to Alexey Danilchenko for all his work. Get the firmware from his Github.
- Color Profile Extraction Tool: cameras often have related color profiles when you open them in Lightroom or Camera Raw. Kodak made color profiles that are embedded in the raw files, but they need to be converted to a Adobe friendly format. Alexey Danilchenko made a tool that can extract this, check out his Github.
- Raw Photo Processor: Some people in old forum posts claim that this Mac program was best at exporting the Kodak DCS 645 Pro Back raw files. Other people say that newer versions of Lightroom or Camera Raw are just as good. I haven’t tried since I don’t own a Mac, but maybe worth a try?
- Phase One DF / DF+ firmware can be upgraded but only if you own the hand grip.

Tethering
This section I have added after writing the blog post. It wouldn’t be fair to review this digital back without using it in a studio tethered to a computer, since that is how the digital back was probably used in most cases back in the days. Getting it to work was not easy, it took me some time to find the lost software (thanks to Steven Englund for sending me the last missing pieces) and also getting it to run.
When you bought the Kodak DCS Pro Back you would have got a CD-rom that contained a free tethering tool called Kodak Camera Manager, but there was also a paid pro tethered tool called Kodak Capture Studio. Both was available for Windows and for Mac (PowerPc architecture of cause, not Intel or M1). And you will need a computer with a Firewire port, which has not been produced for many years.
For Windows I tried a few laptops from the 00’s running Windows Xp, the software installed but it would always fail when it had to connect to the camera. In the readme file it specify mentioned which Firewire cards to use, a few very old PCI-cards and PCMCIA-cards (not something I could find), and I think the problems with the Kodak Windows software is probably related to Firewire card comparability and the Windows Kodak driver. I even tried some of those Thunderbolt to Firewire solutions on a modern pc, no luck either. Windows would be the best option though, since the 32 bit Kodak software would run on any new Windows pc, meaning more speed versus having an old PowerPc mac.
For the Mac software I first tired an old Macbook Pro 2010 (Intel i7) because it had Firewire but also because it was running Mac OS X Snow Leopard which had PowerPc emulation though the Rosetta layer. Sadly even though the Kodak installer would work, the program would start but like the Windows version not find the camera. Who knows why, maybe PowerPc drivers are not supported by Rosetta, or maybe it was because of the Macbook 2010 having Firewire 800 and not Firewire 400. I will also say that the Rosetta emulation layer was pretty buggy, I tired a few other PowerPc apps and had many crashes, so probably not the best solution even if it would work.
So in the end I of cause did the obvious thing which was to just get an old Mac PowerPc machine, and for those 3 PowerPc machines I tried it would always work without problems, so this is also my recommendation for you. You should try to get one of the last PowerPc G4 machines, if you want a desktop solution get the small and still relatively cheap Mac Mini (the original) with a G4 1.25 or 1.42 GHz cpu. Or if you want something portable get the Powerbook G4 (Titanium), either the small 12.1″ inch with a 1.5 GHz cpu (which is what I have, very nice machine) or the larger 17″ model with 1.67 GHz. Even if you get these machines that was the fastest PowerPc machines (I guess G5 was faster but also big machines and expensive) but they are really slow compared to a modern pc, so trying to upgrade this machine is a good idea if you plan to use this for any serious tethering tasks. I maxed out the ram in my Powerbook G4 and also replaced the harddrive with an SSD (this is before Sata so you will need a IDE SSD, something a few companies actually produces, I got the Kingspec Pata 2.5″ 128 gb). You will also need the correct Firewire cable, my Kodak Pro back has a Firewire 400 4 pin plug, and my Powerbook G4 has a Firewire 400 9 pin plug, so I got a long Firewire 400 4p to 9p cable and that worked.
Download links:
» Kodak Camera Manager 4.2 – Windows
» Kodak Camera Manager 4.2 – Mac
» Kodak Capture Studio 2.0 – Mac
» Kodak Capture Studio 2.1 (upgrade) – Mac
If anybody gets the Windows version working or if you get it working on a newer Intel mac, please contact me I would love to know how.
Also if you have more Kodak tethering software to share, i.e. the Windows version of Kodak Capture Studio (which I’m missing) or a newer versions of software than I have, or a native version of the Kodak Capture Studio 2.1 (I hacked that file together from a not working .rar file I got), please sent them to me and I will share them here.
I’m still new to this, and only tried using it a few times, but really enjoy it. See these photos I took for a restaurant, I tried to create a vintage food look that also fits the Kodak Pro Back colors.


Sample Raw Files
I have made a zip file with all the photos from this blog posts raw files, download it here (192 mb).
Conclusion – The King of CCD Sensors
For me it was the best camera I have bought in years. I have been a bit stuck with my photography lately, modern cameras only make photos look good if you shoot in extremely good conditions, and only having to go out in very good photo conditions gets boring. This sensor can even make boring daytime photos look great, a bit like analog film. This camera really has some great colors and great pop to the images. It’s not a tool that can be used in any situation, and I would only recommend this camera to people that are at an expert level with photography. Biggest downsides to the camera it’s big size and the 1×1 square image format (is great for isolating subjects, not great for landscapes).
It’s amazing that such a good camera option existed for so many years, and it must have been very exiting to use this camera when it was first released. Fujifilm announced in 2003 that they where gonna release a digital medium format back, but the product was never released. Imagine how awesome owning a vintage Fujifilm digital back would have been today.
Big thanks to Alexey Danilchenko for creating the custom firmware and other helpful tools. Also big thanks to him for helping me getting up and running with the camera.
Are there other alternatives out there to the Kodak DCS 645 Pro Back? I have looked at photos from other old CCD digital backs, and none of them seem to have that interesting colors. I tried Mamiya ZD for a few days and that camera didn’t have good colors (got scammed on Ebay buying a broken Mamiya ZD and lost a lot of money). I also recently picked up a Fujifilm GFX 50S II, hoping it would also have some of that medium format magic, but it was just like a slightly better Fujifilm aps-c camera, a bit disappointing to be honest.
Wanted!!! If anybody has the Kodak Professional DCS Capture Studio (the Windows version, someone was recently kind to send me the Mac version), please write me!
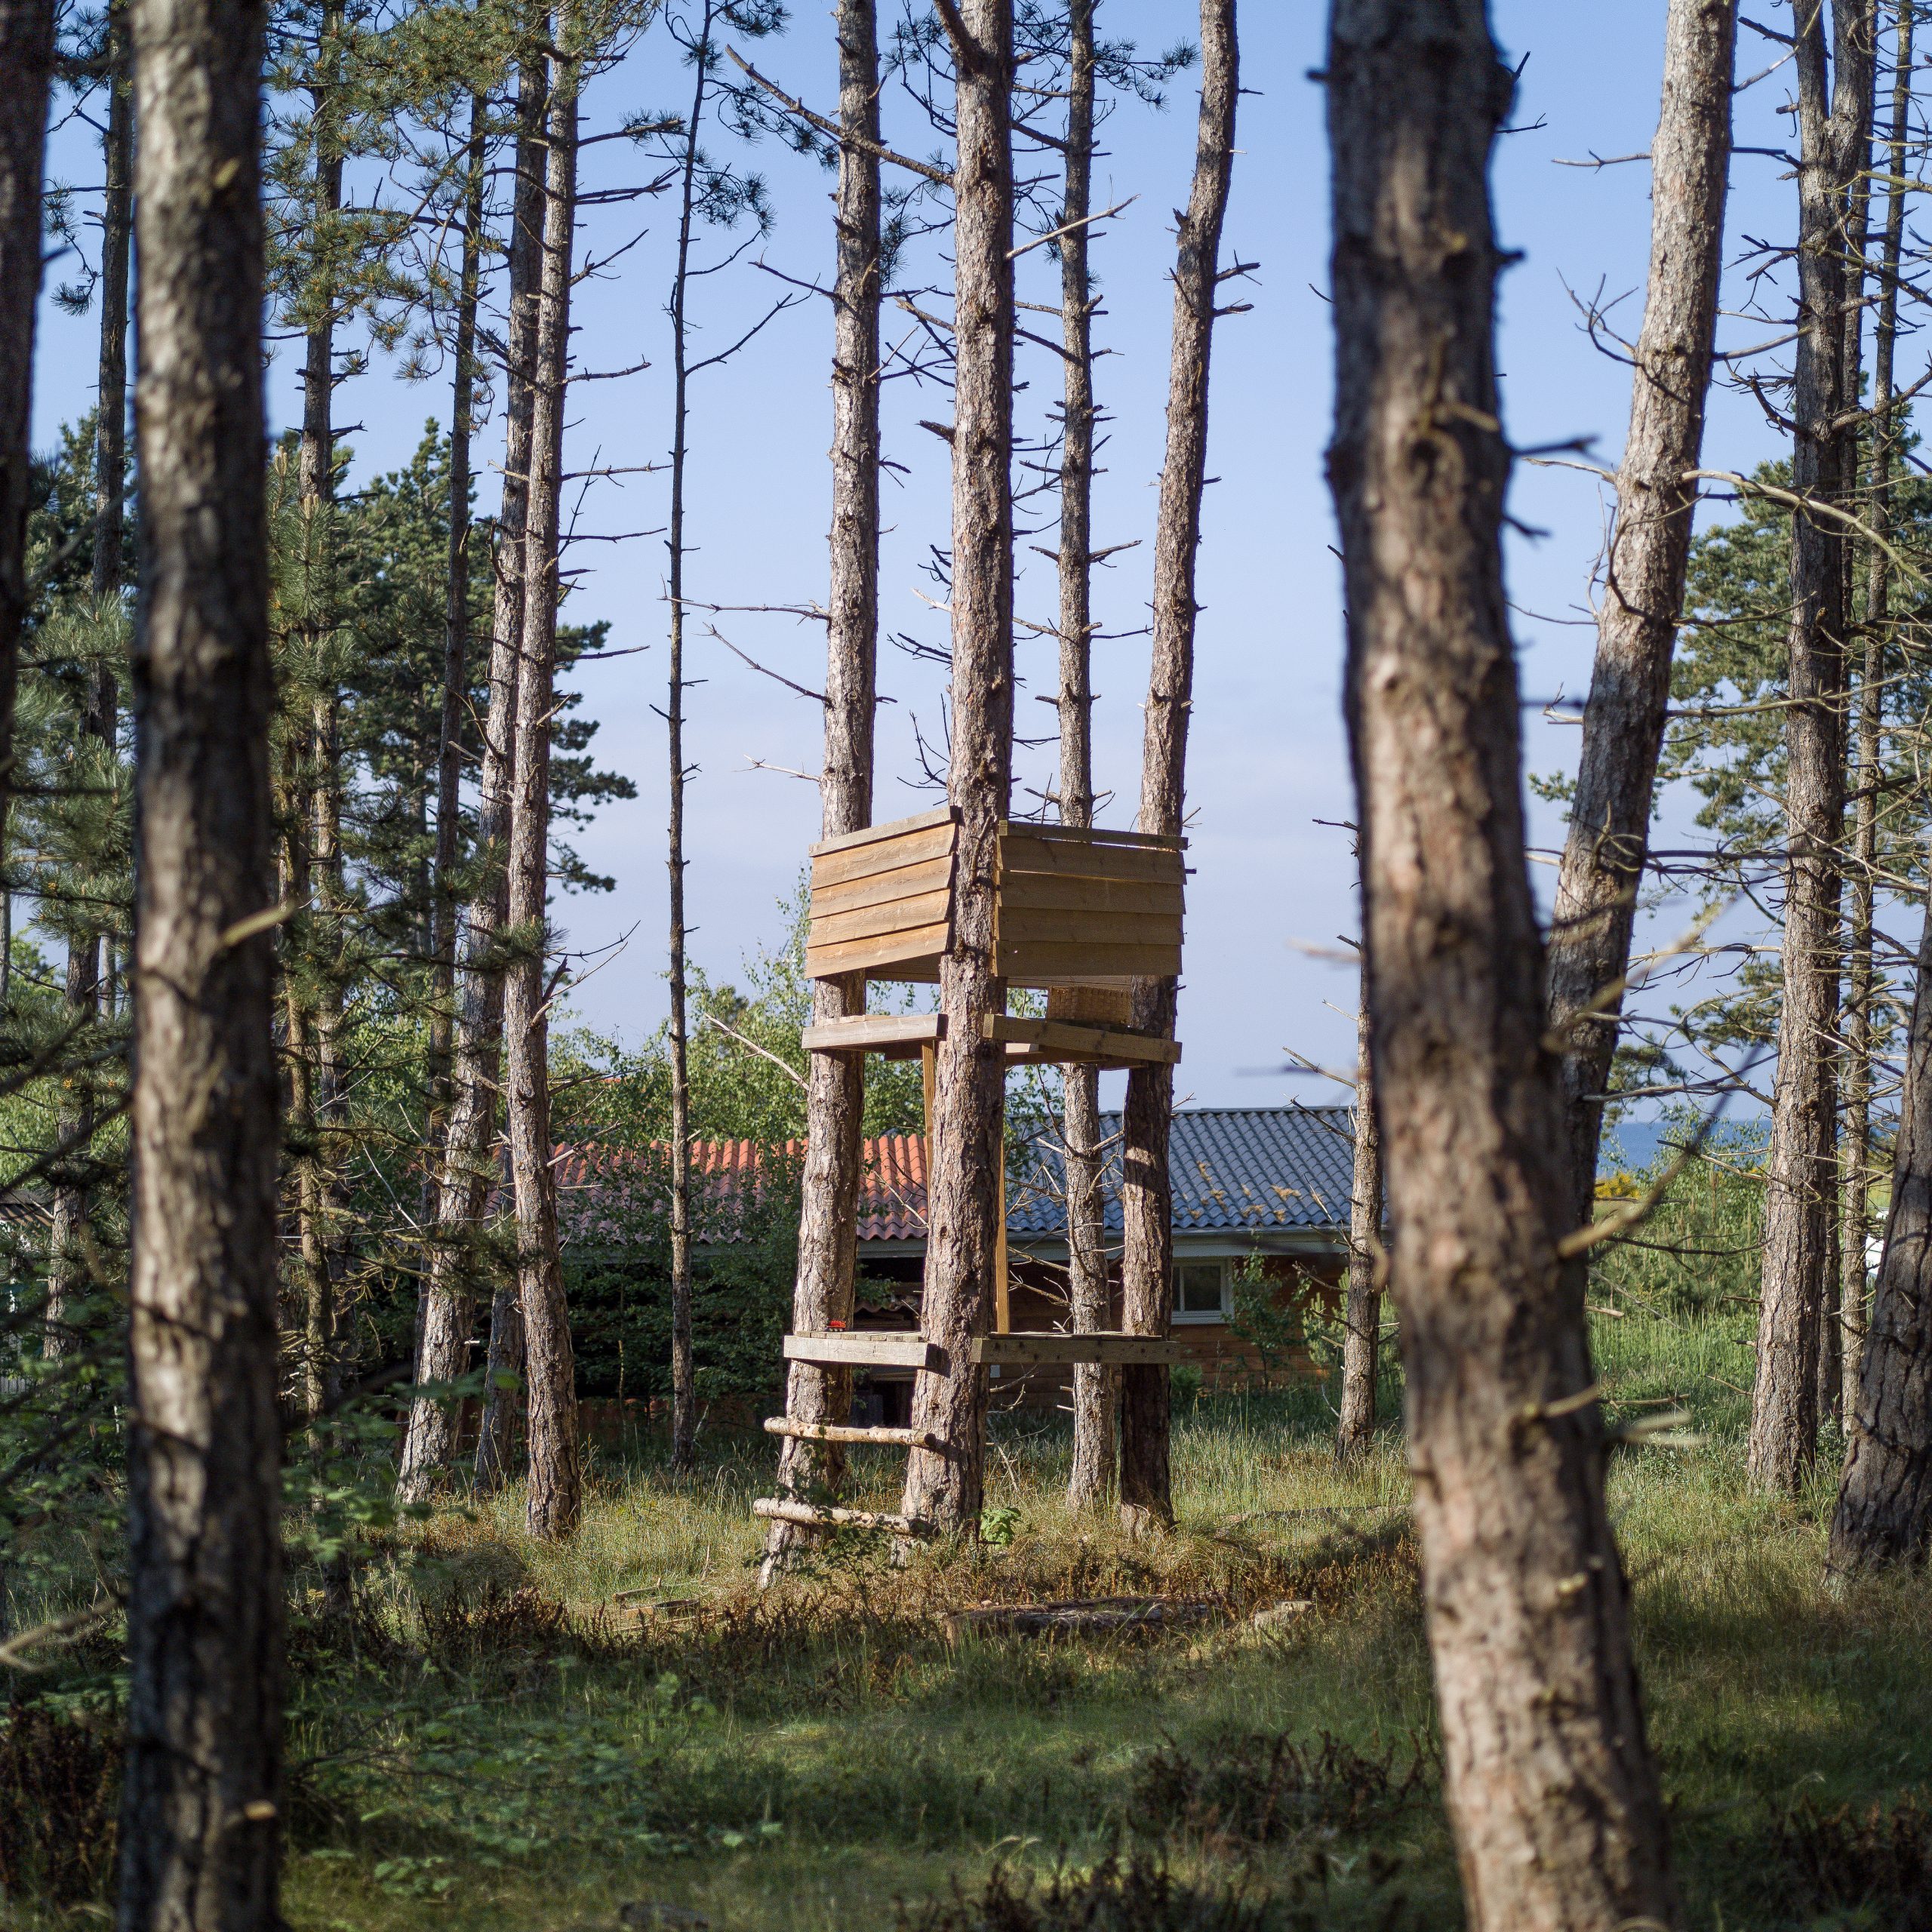
shot using Mamiya Sekor AF 80mm f2.8
Related Links
- Github with all of Alexey Danilchenko’s projects related to Kodak DCS 645 Pro Back.
- Kodak Digital Back Flickr Group
- Tsykhra Tsykhra – a very talented photographer that uses Kodak DCS 645 Pro Back, I especially love his older photos.
- A good lens database page of Mamiya / Phase One lenses.
- A big Phase One / Mamiya lens test made by Teo Totev (Alexey Danilchenko wrote to me that he disagree with the lens results from this test, they do match with the ones I have tested though).
- Pdf manual for Kodak DCS 645 Pro Back.
Update: More photos here added after review was made